How To Set Your First Product Deck
To begin using our product deck, here's an overview of instructions to guide you through the process. Please follow these steps carefully.
When you first start and begin onboarding, the software will greet you with the "All Products" list, which will be readily available for you to explore.
Create New List of Products:
To view only the products you work with, you need to create your own product list. This ensures you have access to and see only the products relevant to you. It's important to do this first to avoid any confusion, as the system may display distribution channels or agencies you don't work with. You want to avoid this to prevent conflicts. If you're unsure about the products you work with, refer to your agency or relevant resources for clarification.
To begin, you'll find your products at the top near the small suitcase icon labeled "All Products."

Next, proceed to click on "Manage all decks" to establish a new list of products you'll be working with.
Afterward, click on "New deck," which will direct you to a page displaying a comprehensive list of distribution channels available on the software. This list includes limited distribution exclusive products tailored to specific agencies. Click on the respective boxes to select the distribution channels or agencies you collaborate with.
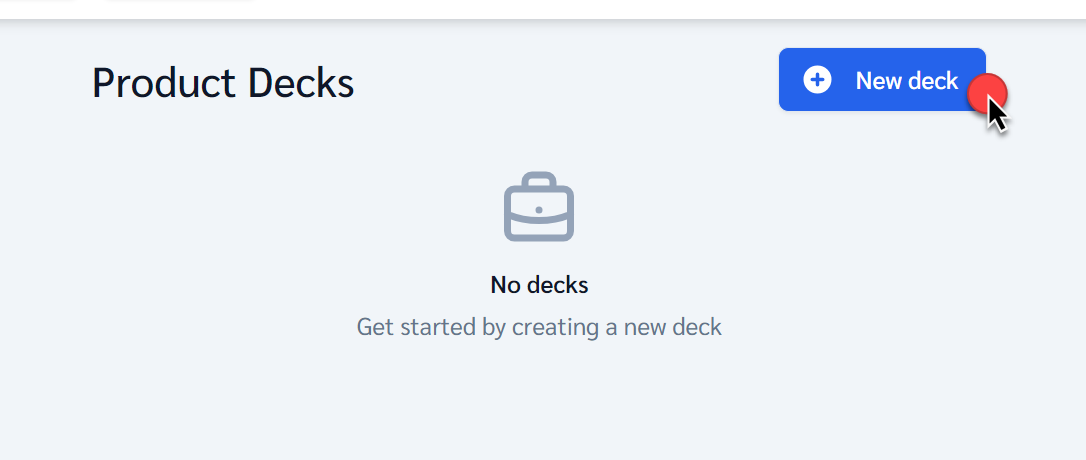
Once you click on the blue button, you'll be directed to a page where you'll need to give it a “Deck Name”. You can choose anything you prefer, such as "My Carriers," "Top Products," or even the name of your agency—essentially, anything that helps you distinguish it effectively.

Once you've chosen your distribution channel, you'll find a list below of the types of annuity products available for selection.

Next, you'll encounter a comprehensive list of all the available annuity types within the software. Ensure you click on the respective box to see the green checkmark, confirming your selection. If it remains blank without a checkmark, it indicates that you haven't selected it yet.

Once you've finished selecting the products, simply click on "Create," and you'll be directed to a new page. There, you'll find a comprehensive list of all the carriers and products you've previously chosen, along with their corresponding distribution channels or agencies.

Once you click "create," another page will open up with the annuity products you selected. Make sure you choose accordingly; for instance, here, only products under the independent agent category, such as FIA, FIXED, MYGA, SPIA, QLAC, and DIA, were selected.
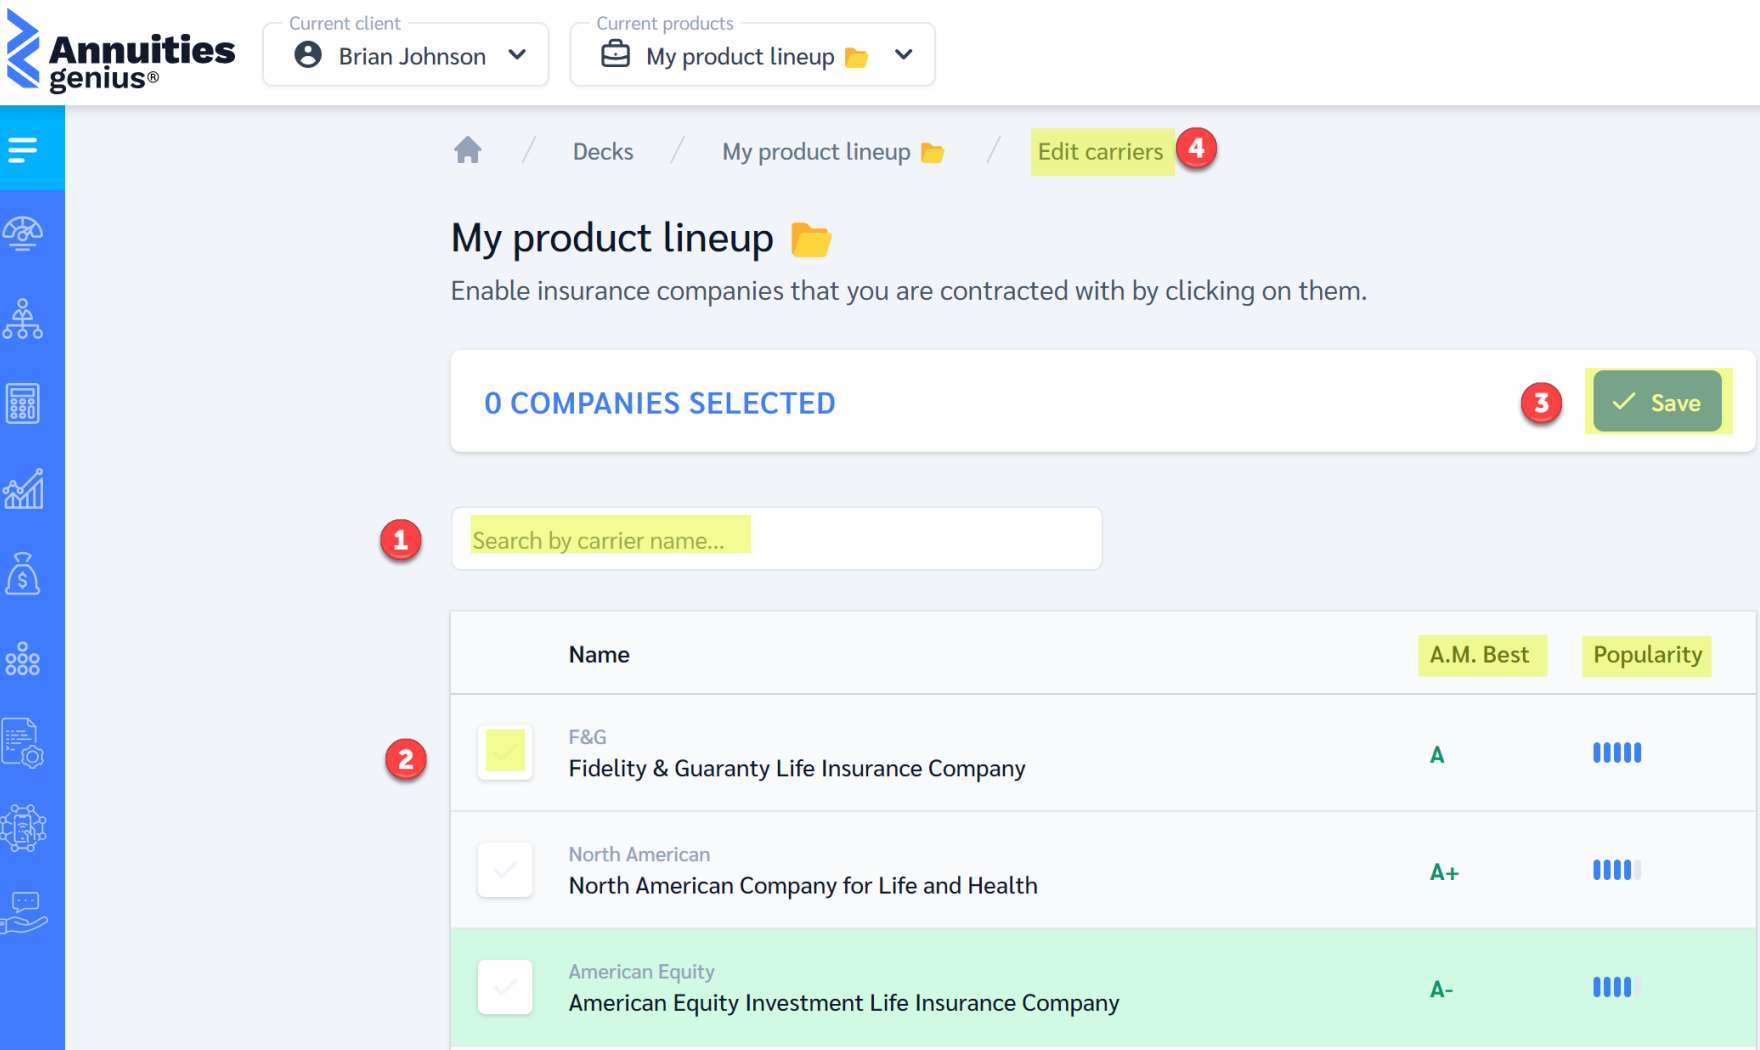
1. You have the option to search by carrier and view their AM Best rating or popularity, which is often the preferred choice among agents or utilized by your agency.
2. Select the carrier by clicking on the box; if there's no green checkmark, it means you haven't made a selection.
3. Use the Save button to preserve your chosen options.
4. Access the Edit Carriers feature if you need to revisit and make changes to annuity products or distribution channels.
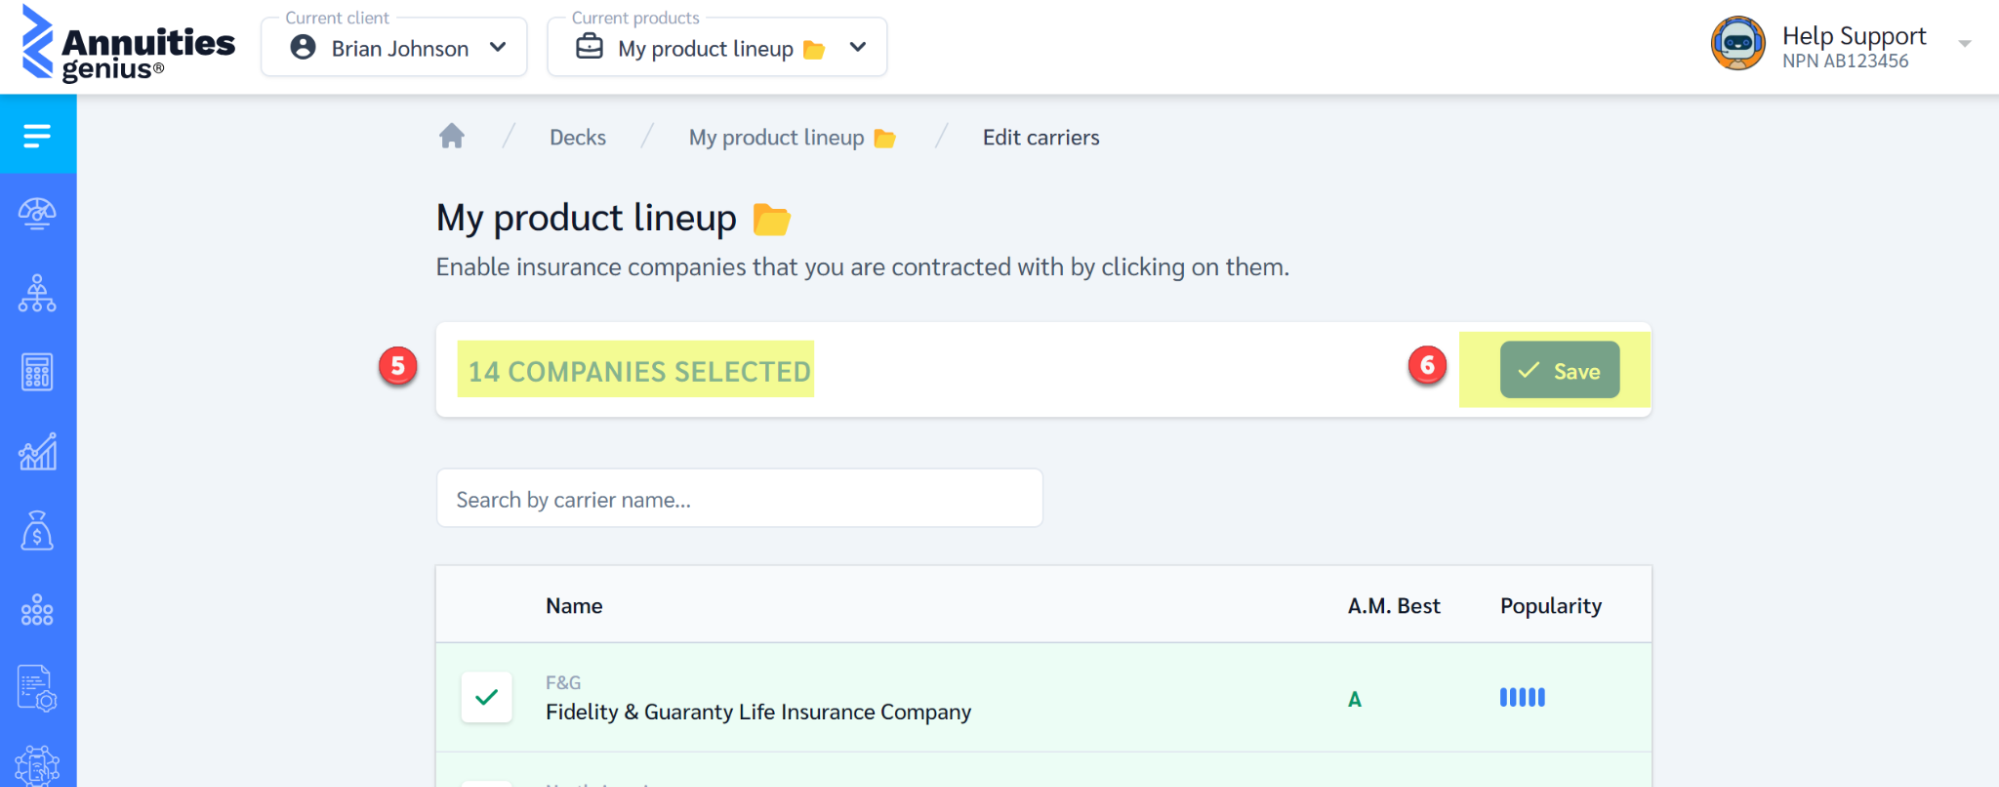
5. This is where you can verify the number of carriers you have chosen.
6. Once again, this button serves as the "save" function. Please ensure to save your work accordingly.
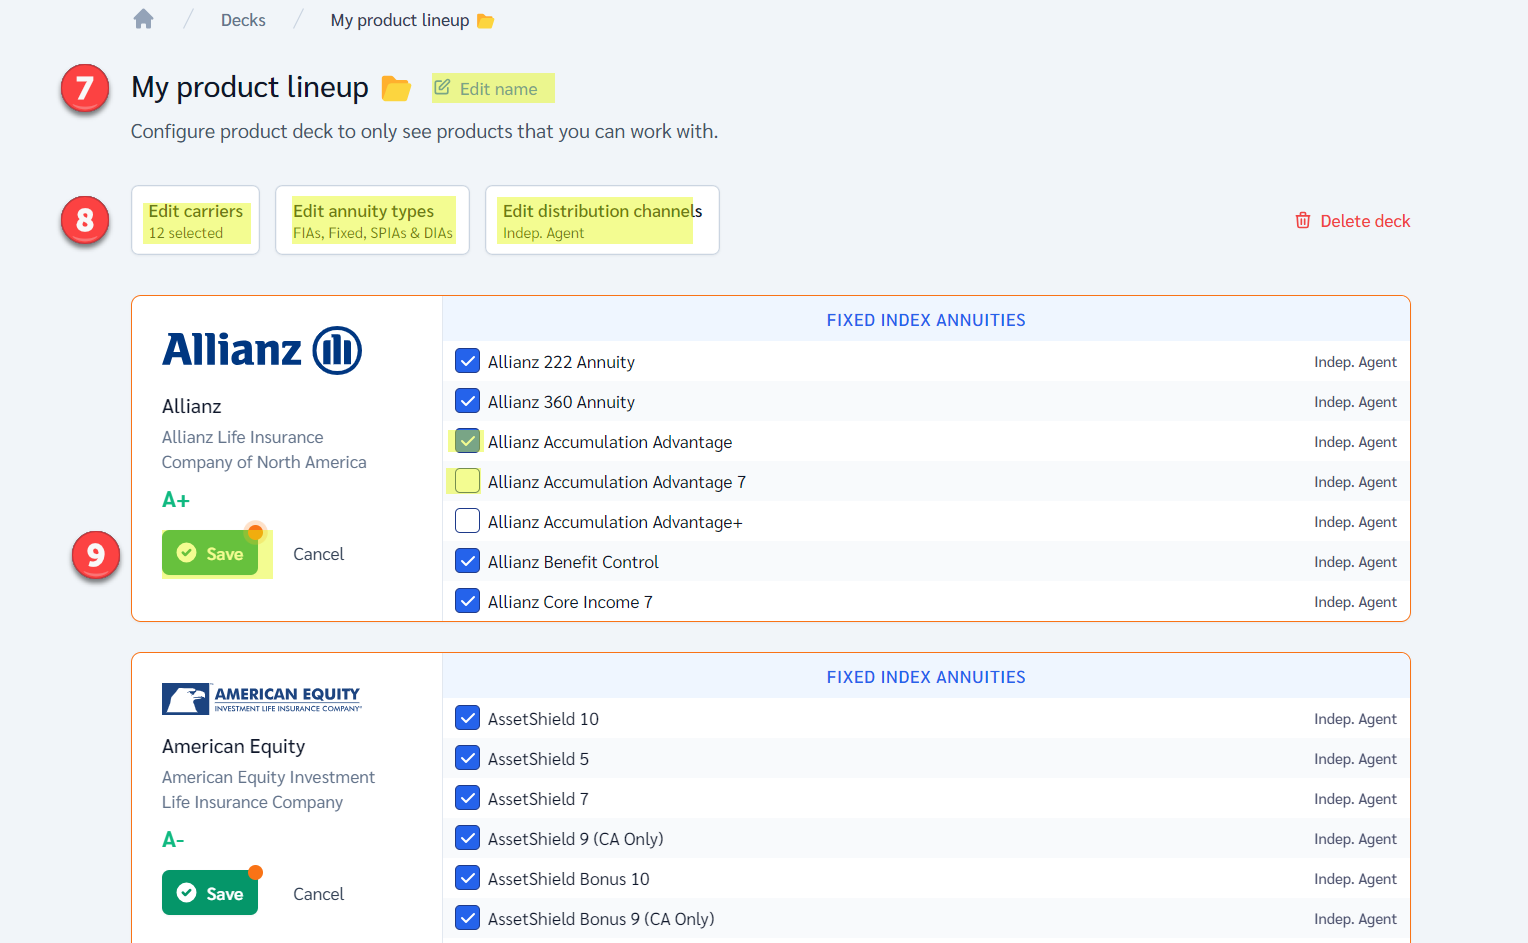
7. Adjust the name for your existing list of product decks.
8. Modify carriers, adjust Annuity Types, or edit Distribution channels. This will enable you to include or exclude selections from this list.
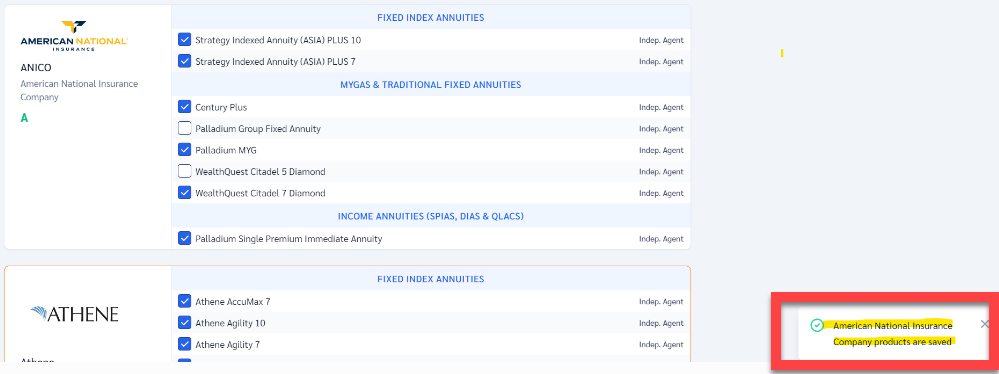
9. Remember to click the blue "save" button for each carrier section when selecting or deselecting products to ensure your work is saved individually.
10. When registering as an "Independent agent" for your distribution channel, please note that there's limited distribution. Make sure to carefully review the list, as selections are not pre-selected for you. You'll need to check each option individually on your end.After you click the save button, it will vanish, and you'll receive a notification confirming that your action has been saved. If the button remains visible without this notification, it means the saving process hasn't been completed.

11. Click on the small home icon to return to the dashboard.

12. After finishing, ensure that the field box next to the suitcase dropdown displays the name of your product deck if you've created one.

If it still shows "All Products", it indicates that you haven't switched it, as we'll discuss in the instructions.

"All Products" will remain as the default list. However, you have the flexibility to create multiple sets of products for various situations.
Manage New Product Deck:
Follow the same instructions as before: click on the downward arrow in orange, then select "Manage Decks." This will open the page displaying the lists you've created or any additional ones. Once again, you'll see the blue button “New Deck”. Simply repeat the same steps.

Navigating between product decks:
Navigate to the section of the annuities database dedicated to managing your decks. Repeat the previous steps: click on the arrow drop-down menu. However, this time, when you want to switch, simply click on the name you prefer from the list. This action will enable you to switch seamlessly between options.
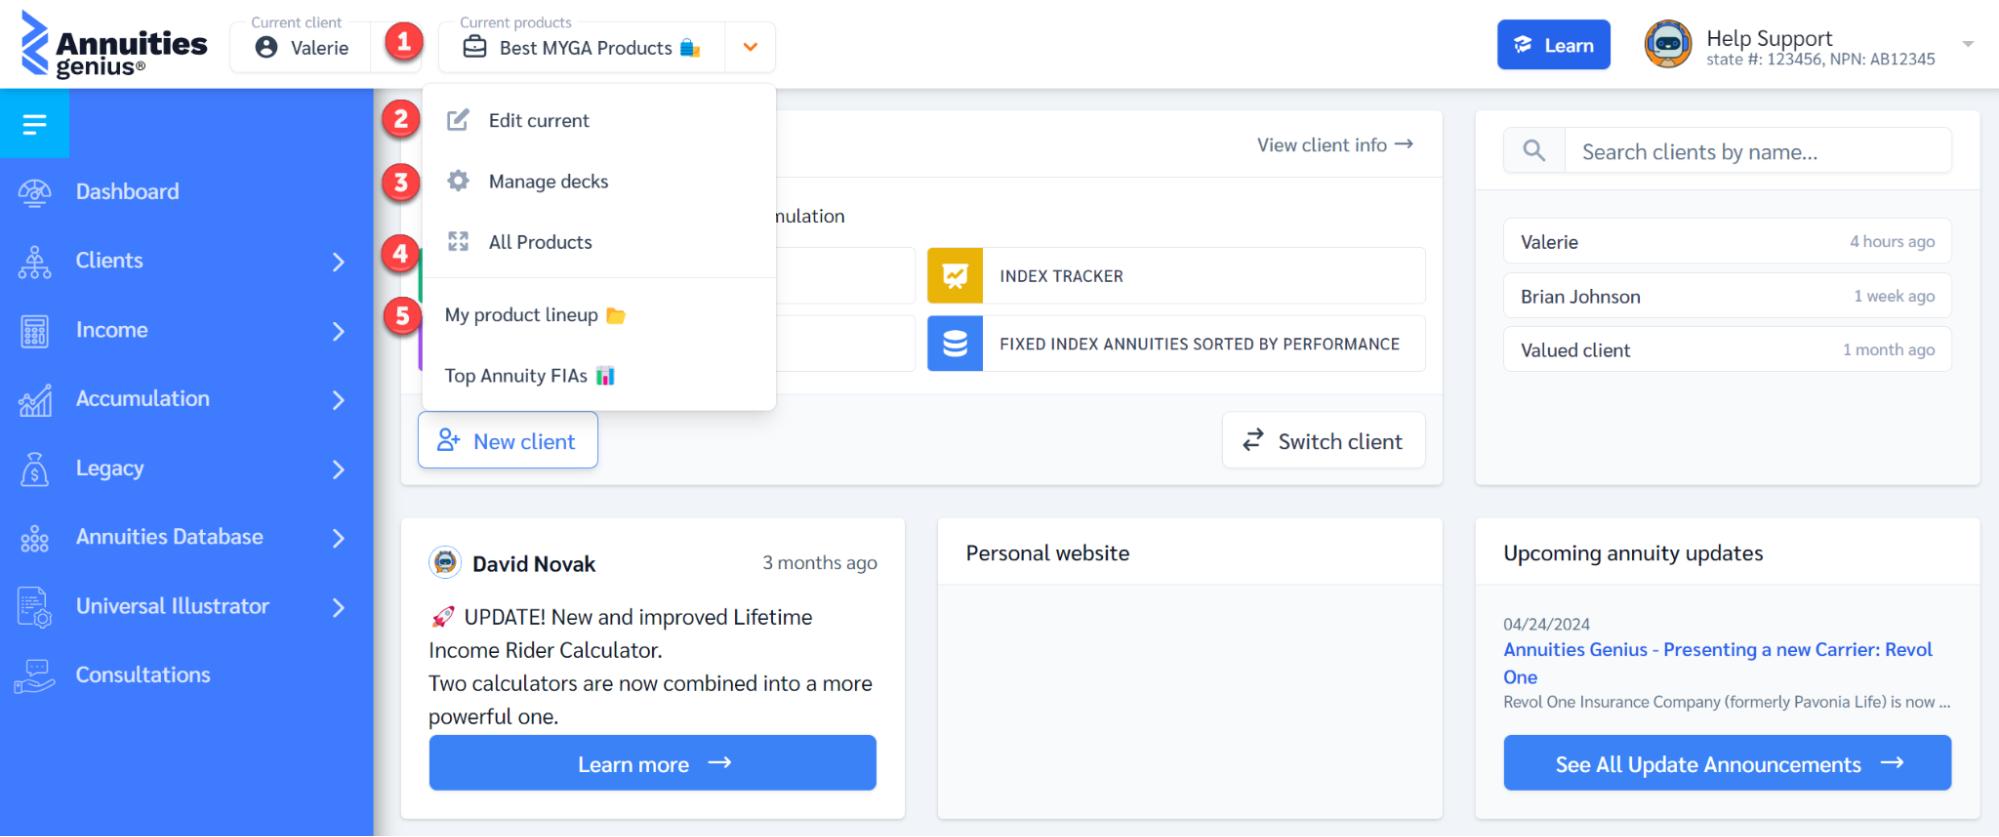
1. For example, let's say I currently have "Best MYGA Products" selected from my list. However, if you need to switch to a different product deck, perhaps because you're working with a different client, you can easily do so. Simply select another option, such as "Top Annuity FIAs". All you need to do is click on it, and it will switch seamlessly.
2. If you wish to return and make changes to your current product deck configuration, simply click on "Edit Current".
3. Clicking on "Manage Decks" will navigate you back to the list, where you can either create a new deck or manage your existing ones.
4. To switch your product list to its standard settings and view all current products, simply click on "All Products".
5. This serves as an illustration of the current product lists I've created as an example. However, when you create your own lists of products, you'll have your own customized selection.

